SKYSCAN 1273
A benchtop that fits all


Highlights
SKYSCAN 1273 – High-Capacity XRM
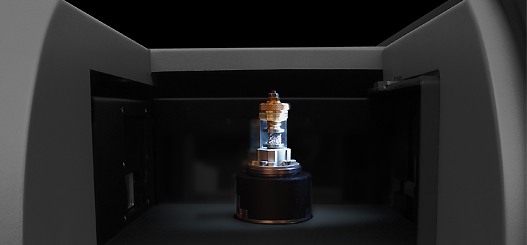
The SKYSCAN 1273 sets a new standard for non-destructive testing (NDT) with benchtop instruments, providing a performance previously only achieved by floor standing systems. Samples with up to 500 mm length, 300 mm diameter, and a maximum weight of 20 kg can be inspected.
The combination of a higher-energy X-ray source running at higher power and a large format flat-panel detector with ultimate sensitivity and readout speed provides excellent image quality in just a few seconds.
SKYSCAN 1273 is complemented by 3D.SUITE. This comprehensive software suite covers GPU-accelerated reconstruction, 2D/ 3D morphological analysis, as well as surface and volume rendering visualization.
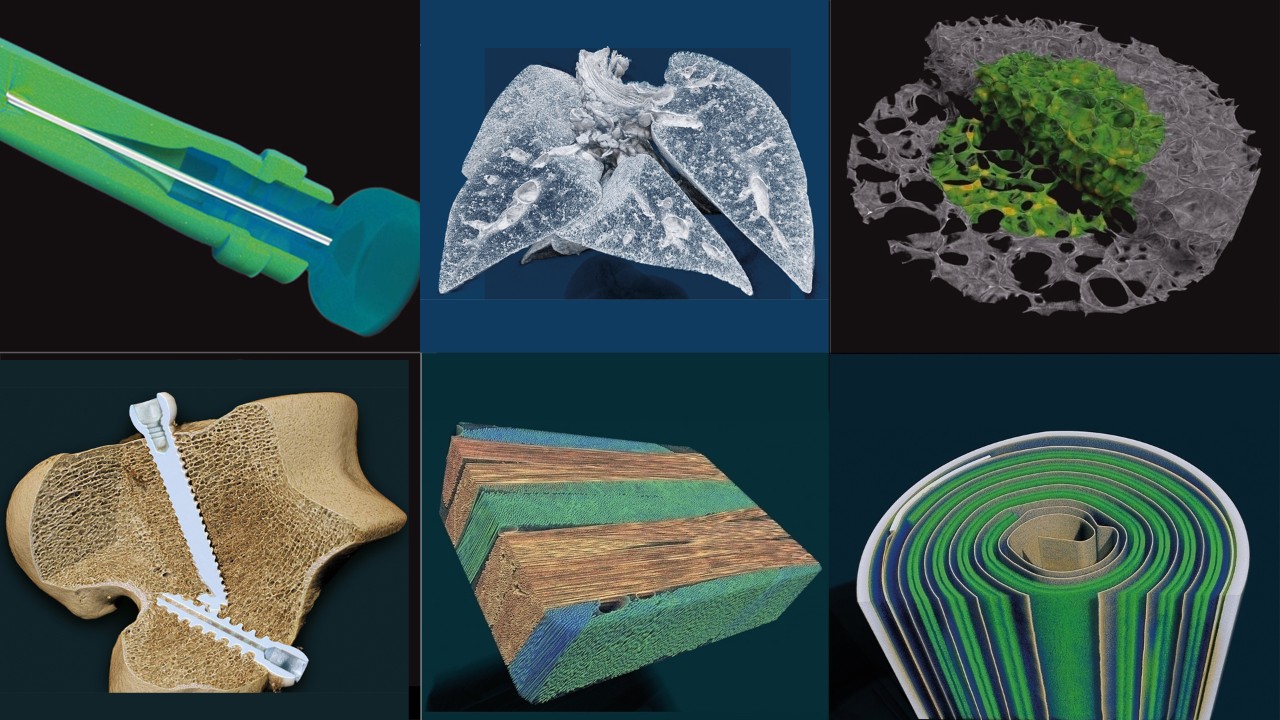
Market Gallery
Additive Manufacturing
Medical Devices
Energy Storage / Batteries
Geological/ Petrochemical
Building Materials
Electronic Components/Devices
Key Features
High-capacity benchtop
The SKYSCAN 1273’s large sample chamber accepts samples larger than what can be scanned with a single detector field-of-view. By offset scanning in sections and putting the large format flat-panel detector in offset positions, SKYSCAN 1273 scans large objects up to 250 mm in diameter and 250 mm in length. 3D.SUITE automatically and seamlessly stitches the oversized images together.
Latest detector technology
SKYSCAN 1273 comes equipped with a large-format 6 MP detector based on the latest flat-panel technology, achieving very high contrast in the accumulated images thanks to the large dynamic range. The fast frame rate in combination with an optimized scintillator enable excellent image quality in a stunningly short cycle of less than 15 seconds, which is ideal for time-resolved 3D X-ray microscopy.
In-situ stages
The Bruker material testing stages are designed to perform compression experiments up to 4400 N and tensile experiments up to 440 N. All stages automatically communicate through the system’s rotation stage, without the need of any cable connections. Using the supplied software, scheduled scanning experiments can be set up.
Bruker's heating and cooling stages can reach temperatures of up to 80ºC, or 30ºC below ambient temperature. Just like the other stages, no extra connections are needed, and there is an automatic recognition of the stage. Using the heating & cooling stages, samples can be examined under non-ambient conditions, to evaluate the effect of temperature on the sample’s microstructure.
SKYSCAN 1273
Helical Scanning
HART Plus
Highlighted Applications
Additive Manufacturing
Additive manufacturing, also commonly called 3D printing, allows the creation of components with complex external and internal structure. Unlike classic techniques which require special molding or tooling, additive manufacturing allows the economical production of both one piece prototypes and large batch production parts. Once completed, confirmation of both the internal and exterior structure is important in ensuring that the component will perform as intended. XRM allows this inspection in a non-destructive manner, giving confidence that a component will meet or exceed specifications.
- Inspection of internal voids for trapped powder
- Validation of external and internal dimensions
- Direct comparison with CAD models
- Analysis of single and multi-material components
Medical Devices and Pharmaceutical Packaging
Designing and testing packaging assemblies is a critical task to ensure medicine can be delivered in a proper and safe way to the patient. XRM allows fast inspection for QC in a non-destructive way maintaining the sterile conditions, giving confidence in the production process and the resulting product’s performance.
- High-throughput scanning of medical devices for QC
- Investigate the integrity of pharmaceutical packaging up to a size of 20 cm x 20 cm x 20 cm
- Monitor and control the quality and alignment of internal metal and plastic components
- Measure external and internal dimensions, and detect defects
Geology
XRM enables non-destructive characterization of a wide variety of geomaterials, from small mineral samples up to large drill cores at full-core size.
- Quantitative analysis of structural parameters, such as grain size, open/closed porosity and connectivity
- Calculate the distribution of mineral phases in 3D
- Correlate the sample structure with mechanical properties by apply in-situ mechanical tests
- Visualize fluid flow, crystallization, dissolution and other processes in porous media
Applications Gallery
SKYSCAN 1273 Specifications
| Feature |
Specification | Benefit |
| X-ray source |
40-130 kV |
Maintenenance-free sealed X-ray source, |
| X-ray detector |
Active pixel CMOS flat-panel, 6 MP (3072 x 1944) |
Excellent signal-to-noise, |
| Object size | 250 mm diameter |
Capability to scan huge samples in a benchtop instrument |
| Dimensions | W 1250 mm x D 815 mm x H 820 mm |
Space-saving benchtop system that fits in every lab |
| Power supply |
100-240 VAC, 50-60 Hz, 3 A max. |
Minimum installation requirements, a standard power supply suffices |
POSITION, SCAN, RECONSTRUCT and ANALYZE
Bruker XRM solutions include all software needed to collect and analyze data. An intuitive graphical user interface with user guided parameter optimization support both expert and novice users. By using the latest GPU powered algorithms, reconstruction time is substantially reduced. CTVOX, CTAN and CTVOL combine to form a powerful suite of software for both qualitative and quantitative analysis of models.
Measurement Software:
SKYSCAN 1273 – Instrument control, measurement planning and collection
Reconstruction Software:
NRECON – Transforms the 2D projection images into 3D volumes
Analysis Software:
DATAVIEWER – Slice-by-slice inspection of 3D volumes and 2D/3D image registration
CTVOX – Realistic visualization by volume rendering
CTAN – 2D/3D image analysis & processing
CTVOL – Visualization of surface models to export for CAD or 3D printing
Webinars
Service & Support
- Helpdesk for technical issues with hardware, software, and applications support using web based and advanced remote service tools.
- LabScape Maintenance Service Agreements
- On-site, on-demand support
- Installation and operational qualification as well as performance verification
- Site planning, relocation, and consultation
- Replacement and spare parts, consumables, and in-person and online training
- Software updates, manuals, and LabScape MSA management (↗brukersupport.com)

