
DIFFRAC.MEASUREMENT CENTER
Have full control over your XRD tool
The MEASUREMENT CENTER software package comprises a set of measurement and maintenance plug-ins:
- COMMANDER: The control center for managing interactive as well as background measurements and display of all status information of the diffractometer system
- DAVINCI: The intelligent virtual goniometer providing for true plug & play X-ray diffraction analysis for the D8 (with DAVINCI design) diffractometer family
- WIZARD: Graphical interface for intuitive creation of measurement tasks for powder diffraction, HRXRD, stress, and texture applications
- JOBLIST / STARTJOBS: Comfortable job controller with build-in scheduler and history. Jobs can be stopped, deleted, resumed, restarted and prioritized.
- CONFIG/ TOOLS: Easy and intuitive instrument configuration and control
- LOG: Comprehensive logging of all instrument events
- DB MANAGEMENT: Centralized user's management and full audit trailing
- RESULTS MANAGER: Collects all measured data and evaluation results from TOPAS BBQ, DQUANT and EVA in one place, ready for creating reports.
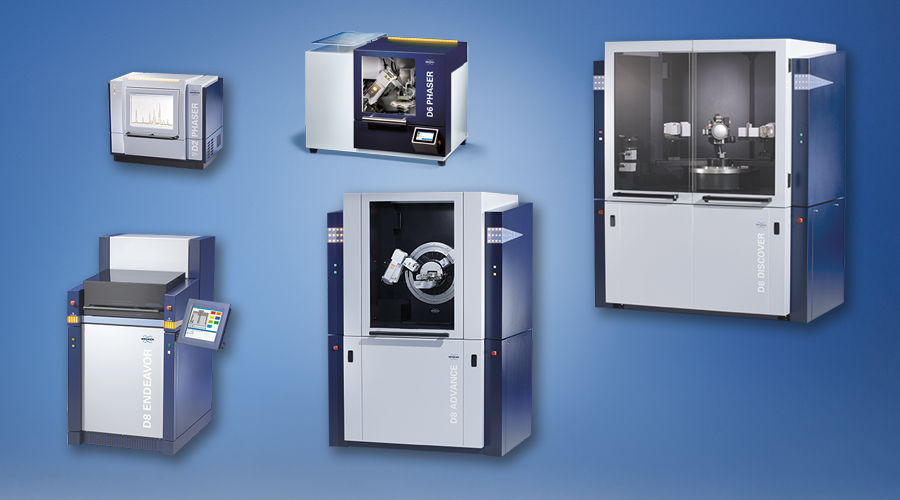
The MEASUREMENT CENTER can access and control any number of D2 PHASER, D8 DISCOVER, D8 ENDEAVOR and D8 ADVANCE diffractometers within a customer's network. Licensing includes installation of the MEASUREMENT CENTER on all customer's PCs to enable unlimited networked operation or use of a single diffractometer in a stand-alone environment.
COMMANDER – Direct Access for Measurement Control
The COMMANDER plug-in is ideal for all users, who want to a quick overview and direct control of all parts of the diffractometer. The COMMANDER displays the instrument state including hardware settings, measurement progress and measured data. The display of instrument components automatically adapts to the active configuration. Users can move drives, select the beam path of the TWIN, TRIO or PATHFINDER optics, change generator and non-ambient settings and create or launch measurements.
The COMMANDER interface with its zoomable live display of measured data is ideal for quick testing of experimental parameters – and when the right conditions are determined, they can be saved as Jobs for future use.
WIZARD – Guided, Graphical Method Development
Planning even complex X-ray diffraction experiments is made simple in the WIZARD. Here, measurements can be created for the different fields of X-ray diffraction, including XRD, HRXRD, SAXS, Stress, Texture or Aluminium Bath Control. The graphical user interface of the WIZARD guides the user first through the instrumental configuration using the virtual DAVINCI goniometer. Then, scan parameters are defined and (optionally) combined to measurement series, for example for mapping applications or non-ambient experiments.
DAVINCI Design – Uncompromised Ease-of-Use
The DAVINCI design is the key to mastering the modularity of our X-ray diffractometers – even for a novice user. From the X-ray tube, through optics and sample stages all the way to the detectors, any user can change from one beam geometry to another or exchange individual components with no trouble at all.
The DAVINCI.MODE facilitates real-time component recognition and status display of the components, while the virtual goniometer of the DIFFRAC.DAVINCI software intuitively guides the user through the setup either interactively and in real time, or in the experiment planning state using the WIZARD.
START JOBS and JOBLIST
Predefined measurements for new samples can be launched in the START JOBS plug-in using the table editor or the operator friendly job template interface. For high-throughput screening systems, a dedicated well-plate view allows fast and easy selection of measurement positions. Jobs can be validated against the actual configuration, and also linked to automatic post-processing and evaluation routines for push-button solutions.
Routine measurements, such as an intensity check of a monitor sample are scheduled via the JOBLIST. Here, the measurement progress is monitored, individual jobs can be stopped or restarted and newly added jobs for important samples prioritized.
RESULTS MANAGER – Data Mining and Reporting
All measured data is stored in the instrument’s database and can be displayed, filtered, searched for and exported in the RESULTS MANAGER. In addition to measured data, evaluation results from DQUANT, TOPAS BBQ and EVA can be stored in the database and easily accessed through predefined and custom views of the RESULTS MANAGER.
Users can:
- view a subset of measured data, filtered e.g. by operator, time range or sample ID
- identify trends and monitor evaluation parameters, such as peak positions, intensities or concentrations across over a period of time
- display results as lists, tables or charts, and highlight numerical results that are out of user-defined limits for production and quality control purposes
- create reports including table, charts views and measured data
DIFFRAC.MEASUREMENT CENTER Specifications
Version |
The current version of the software is DIFFRAC.MEASUREMENT CENTER V8.61 DIFFRAC.MEASUREMENT CENTER 21 CRF Part 11 V7.5 |
|
Compliance |
cGxP/21 CFR Part 11 |
|
Customization |
Scripting support for e.g. auto-alignment functionality or interface to user specific instrumentation LIMS connection Automation interface |

